How To: Unlock iPhone 4 Or iPhone 3GS On iOS 6 With UltraSn0w Fixer
This is obviously only useful for unlockers who rely on a specific baseband version to maintain their unlock. For those of you who use UltraSn0w, you were probably disappointed that is has not yet been updated foriOS 6compatibility.
If you have been unlocking withUltraSn0wfor some time now, you probably have gotten used to the fact that UltraSn0w updates can often times take weeks, if not months. As such, to tide you over until theofficialUltraSn0w foriOS 6release, a package calledUltraSn0w Fixerwas created that will make UltraSn0w function on theiOS 6firmware generation.
UltraSn0w Fixer foriOS 6works on the JailbrokeniPhone 4or iPhone 3GS with one of the following baseband versions - 01.59.00, 04.26.08, 05.11.07, 05.13.01, 05.12.01 or 06.15.00.
Unlock iOS 6 With UltraSn0w Fixer
Step 1) - The first thing you will need to do isJailbreakyouriPhone 4or iPhone 3GS on theiOS 6firmware. Forinstructionson how to do thisclick here.
Step 2) - Now launchCydiafrom your SpringBoard (homescreen), go into the Manage tab, Sources section, tap the Edit button and then the Add button. You will need to add the iparelhos repository:
http://repo.iparelhos.com
Step 3) - With the iparelhos repository added, you will nowneed to installtheofficialversion of UltraSn0w. That is right, you arenotgoing to install UltraSn0w Fixer foriOS 6first, but rather theofficialversion of UltraSn0w.
Step 4) - Once UltraSn0w has been installed, now you willneed to installUltraSn0w Fixer foriOS 6to your iPhone.
With both UltraSn0w and UltraSn0w Fixer foriOS 6installed you should have anunlockediPhone 4or iPhone 3GS. Congrats! If you have any further questions or thoughts please turn your attention to the comments section below.
How To: Unlock Your iPhone 4 Or iPhone 3GS On iOS 6.0.1 With UltraSn0w Fixer For iOS 6.0.1
Moments agowe told you that UltraSn0w Fixer was updated to be compatible with the iOS 6.0.1 firmware, and in case this is your first time using UltraSn0w Fixer we are providing a step-by-steptutorial. In thistutorialwe will cover how tounlock your iPhone4 or iPhone 3GS on a compatible baseband running the iOS 6.0.1 firmware.
UltraSn0w Fixer for iOS 6.0.1 works on the Jailbroken iPhone 4 or iPhone 3GS with one of the following baseband versions - 01.59.00, 04.26.08, 05.11.07, 05.13.01, 05.12.01 or 06.15.00.
How To Unlock iOS 6.0.1 With UltraSn0w Fixer
Step 1) - The first thing you will need to do is Jailbreak your iPhone 4 or iPhone 3GS on the iOS 6.0.1 firmware. For instructions on how to do this click here.
Step 2) - Now launch Cydia from your SpringBoard (homescreen), go into the Manage tab, Sources section, tap the Edit button and then the Add button. You will need to add the iparelhos repository:
http://repo.iparelhos.com
Step 3) - With the iparelhos repository added, you will now need to install theofficial version of UltraSn0w. That is right, you are not going toinstallUltraSn0w Fixer for iOS 6.0.1 first, but rather theofficial version of UltraSn0w.
Step 4) - Once UltraSn0w has been installed, now you will need to install UltraSn0w Fixer for iOS 6.0.1 to your iPhone.
When both UltraSn0w and UltraSn0w Fixer for iOS 6.0.1 are installed, you should have anunlockediPhone that is compatible with any SIM card! If you have any further questions or thoughts please direct your attention to the comments section below.
More Galaxy S IV Rumors: 13 Megapixel Camera, Quad-Core A15 Processor
The Galaxy S IV rumor mill has really began churning in earnest in the last couple weeks, as more and more rumors of dubious provenance show up in every nook and cranny of the internet. We heard last week that Samsung isworkingon asuper fancy new display - a 5-inch, 1080p AMOLED panel with an impressive 441 ppi – and that it might be destined for inclusion in the Galaxy S III’s successor.
Today, more rumors have emerged regarding the follow-up to Samsung most successful Android flagship.GSM Arena is reporting that a 13 megapixel camera will grace the Galaxy S IV, and possibly an Exynos 5450processortoo. The Exynos in question would be a quad-core, 2GHz A15processor, and would surely blow everything on the currentmobile marketout of the water.
Apparently, the 13 megapixel camera was supposed to be included on theGalaxy Note IIoriginally, but supply issues prevented that, and the Note II got the same 8 megapixel sensor as the Galaxy S III has. The plan at this point is to sort those supply-side issues out in time for the release of the S IV, so that it can have that aforementioned 13 megapixel unit.
At this point, many of the Galaxy S IV rumors going around are a mix of vague supply chain hints and pure conjecture, so take them with agrain of salt. If these specs do end up being accurate, though, the S IV is going to be a beast of a phone. One does have to wonder how Samsung will manage to makethe batterylife acceptable on a phone with that beefy of aprocessor, and that big of ascreen. They’ve been pretty good in the past about releasingphoneswith adequate battery life, so we’ll assume they’ve got atrickup theirsleeve.
We’re expecting the Galaxy S IV to make its first official appearance sometime in the first half of next year.
How To: Backup And Transfer Your OpenFeint Saved Games, Or Any Other Game Data On iOS
As you may have heard, OpenFeint–the original free socialgamingplatform for the iPhone–will beshutting the doors to their service on December 14th.Gamesthat rely on OpenFeint have been advised to switch to GREE (?), a service run by the company that bought OpenFeint, but that doesn’t help us if our favorite oldgamesaren’t getting updates. If you don’t want to lose your legacy game data, here’s a guide to backing up your saves between devices.
While this guide is made for OpenFeintgamesin mind, you can use it to safely back up andtransferdata from any app, including apps that don’t support cloudsave gametransfers in the first place.
Connectinga FTP to the iPhone, iPad or iPod Touch toTransfer Files
What you will need:
A jailbroken iPhone, iPad, or iPod Touch
A computer with an FTP client, such asWinSCPor FileZilla
OpenSSH
1. If you don’t already have OpenSSH installed on your iPhone or iPad, install it from Cydia now. If you have SBSettings installed on your device, make sure the SSH toggle is enabled. You will also need a FTP Client like WinSCP for your computer.
2. Ensure that you are on the same WiFi network as your device. Enter the following information into WinSCP, and then press login.
Host name: (Your device’s WiFi IP address. You can find the address in the SBSettings window.) Username: Root Password: (“Alpine” by default. If you don’t change thedefault password, make sure to turn the SSH toggle off when you’re done.)
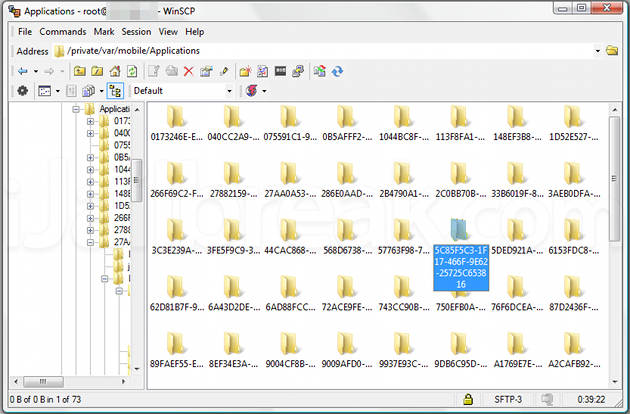
This directory was never intended to be read by people and as such isn’t very helpful.
Normally, all the apps you’ve downloaded are stored in one place: “/private/var/mobile/Applications/“. Getting there isn’t difficult, but finding anything in this directory manually is a pain, especially if you have a lot of apps. The HEX names for the files in this directory appear to be in gibberish, and they are different from machine to machine. You could poke through them one at a time, while taking notes, but that would take forever.
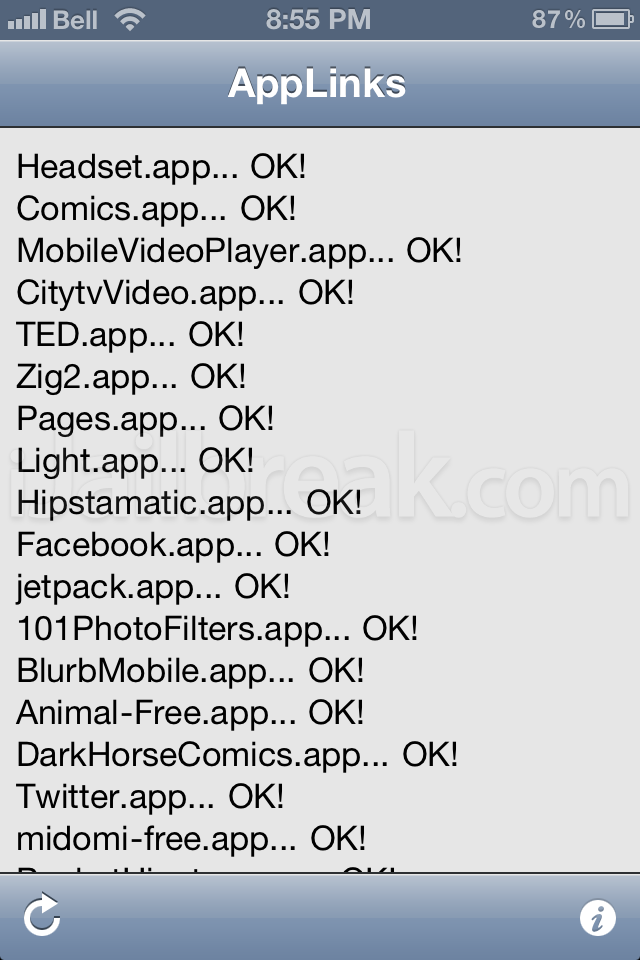
The AppLinks Cydia utility.
Lucky for us, there’s a trick to finding which files contain the apps we want. The trick is calledAppLinks–a free Cydia utility that will create a human-readable alternate shortcut directory for your apps. Just install AppLinks, run it from Springboard, press the refresh button, and you’ll have an app directory that isn’t filled with gibberish.
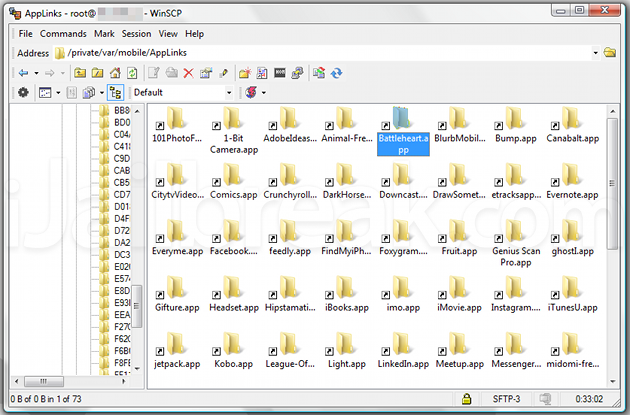
Using afile transfer programlike WinSCP or FileZilla, navigate to “/private/var/mobile/AppLinks“, which should be far easier for you to read than~/mobile/Applications.
With AppLinks installed, you have a far easier time browsing throughthe applicationfolders.
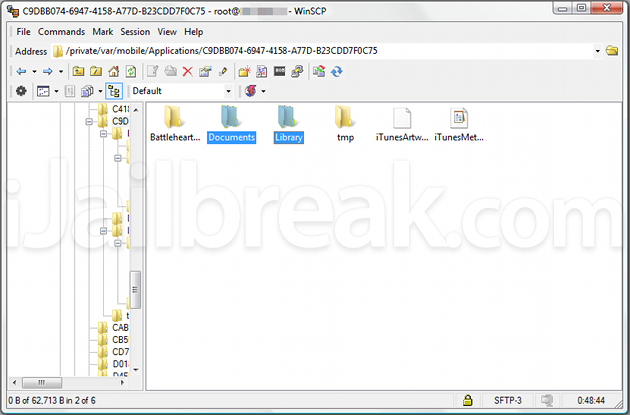
Next find whichever app it is you want to snag save data from. You don’t have to copy the entire app folder–unless you really want to needlesslytransferhundreds of megabytes back and forth. Instead just select the Documents and the Library folders, then drag and drop the files to your computer’s desktop.
From here you can store thesave gamefolders to a new file as a backup ortransferthe saves to a different device–which can also be done with AppLinks and WinSCP. Just make sure thatthe gameis not in the app switcher while you’re replacing files, as otherwise thetransfermaynot work.
Sure, you won’t have online leaderboards unless the developers eventually updatethe game, but you won’t lose your progress either if you follow the tweak.
Did you find this guide helpful? Share your thoughts in the comments section below.
Here are some important points to note before you proceed.
This guide is meant for iPhone 4, iPhone 3GS, iPod touch 4 users.
Sn0breeze 2.9.7 only supports a tethered jailbreak, which means that you need to connect your iPhone to the computer on every reboot (except iPhone 3GS with older bootrom). It is currently not possible to jailbreak iPhone 5, iPhone 4S, iPad 2, iPad 3 and iPod Touch 5G.
Since you need to restore your iOS device with the custom firmware created by Sn0wbreeze, it is extremely important that you take a backup your iOS device before you proceed. You can refer to this post for instructions on how to backup your iOS device using iCloud or this one to backup your iOS device using iTunes.
Please ensure you are running latest version of iTunes i.e. iTunes 10.7 or later.
Step 1: Download Sn0wbreeze 2.9.7 from this link and save the application in a folder named “Sn0wbreeze” on your desktop.
Step 2: Download iOS 6.0.1 firmware file for your iOS device from the links mentioned below:
Step 3: Double click the Sn0wbreeze zip file and extract the application.Navigate to the Sn0wbreeze folder and launch the Sn0wbreeze application.
Windows 7 users should run the exe in Windows XP compatibility mode (right-click on the Sn0wbreeze exe and select Properties, then select the Compatibility tab and select Run this program in compatibility mode for Windows XP). Windows XP and Windows 7 users should run Sn0wbreeze as ‘Administrator’ (right-click on the Sn0wbreeze exe and select ‘Run as an Administrator’).
Step 4: Click on the blue arrow button.
Step 5: Then click on Browse for an IPSW button. Navigate and select the firmware file download in Step 2 and then click on the Open button.
Step 6: Sn0wbreeze will recognize the iOS firmware file and enable the blue arrow button. Click on the arrow to proceed.
Step 5: Now click on the Simple Mode button from the list of options.
Step 6: iPhone users will be prompted if they want to active their iPhone? Click on the Yesbutton to continue.
Step 7: Sn0wbreeze will now start creating the custom iOS firmware file. This can take around 5-7 minutes. Sn0wbreeze will inform you when it has successfully created the custom IPSW file. You will be able to find the IPSW file prefixed with “sn0wbreeze_” on the Desktop. Click on theOk button to continue.
Step 8: You will now be prompted to put the iOS device in DFU mode. Turn off your device and put your iOS device in DFU mode by following the on-screen instructions:
(a) Prepare to press and hold the Power button on your iOS device.
(b) Now simultaneously hold the Home button and Power buttons for 10 seconds.
(c) Now release the Power button while keeping the Home button pressed until Snowbreeze detects your iOS device in DFU mode.
Step 9: It will run iREB and inform you when your device is in PWNED DFU state, which will allow you to restore your iOS device using the custom iOS firmware file created by Sn0wbreeze.
Step 10: Launch iTunes, it will inform you that your iOS device is in recovery mode. Click on theOK button.
Step 11: Select your iOS device from the left hand side bar under DEVICES. Then hold the Shift key on the keyboard and click on the Restore button under Summary tab.
Step 12: Navigate and select the IPSW file prefixed with “_sn0wbreeze” that was created in Step 7. iTunes will inform you that it will erase and restore your iOS device to iOS 6.0.1 and will verify the restore with Apple. Click on the Restore button if you’ve taken a backup of your iOS device.
Step 13: The restore process could take approximately 10-15 minutes. You should see the Sn0wbreeze icon on your iPod touch during the restore process indicating that the custom firmware is restoring.
Step 14: After it has restored successfully, you need to use iBooty to perform a tethered boot.
Step 15: Launch iBooty from the iBooty folder in the Snowbreeze folder. Click on the Select your iDevice dropdown and select your iOS device.
Step 16: You will now be prompted to put your iOS device in DFU mode. Turn off your device and click on the Start button to put your iOS device in DFU mode by following the on-screen instructions:
(a) Prepare to press and hold the Power button on your iOS device.
(b) Now simultaneously hold the Home button and Power buttons for 10 seconds.
(c) Now release the Power button while keeping the Home button pressed until iBooty detects your iOS device in DFU mode.
Step 17: iBooty will now perform a tethered boot and after it is successful, take you back to the lock screen. You can now setup your iOS device and restore from iCloud or iTunes.
That’s it, after your iOS device has been successfully restored, you should see Cydia on the Home screen. If you don’t find it on the Home screen, please don’t panic, search for it using Spotlight.
If you’ve any problem jailbreaking your iPhone or iPod touch then check out this video tutorial:
If you’re new to the jailbreaking world and wondering what to do after jailbreaking your iOS device, checkout our jailbreak apps category page to find out the apps you can install on your iOS device using the Cydia app.
Hope this helped. Please don’t forget to let us know how it goes in the comments and drop us a line if you hit any issues.